One structure to rule them all?
In my search for coming up with the best way of structuring online courses I have come across many different ways of creating a single class.
Most course creators just wing it, diving right into the content without thinking about the level of skill the students will have or what information they already have or lack. Most importantly there is no “attention grabbing” up front, no reasons why this class is a better use of time over other learning materials.
For any learning content to be successful it is important to remember what you are up against. Thousands of pieces of “content” are launched every minute. If you don’t catch the interest of your audience in the first couple of seconds they’ll move on.

Ramit Sethi introducing the course “Earnable”
Today we are looking at a timeless structure that has been proven to work for the last 60+ years by organisations like “Berkeley Lab Training” and at international universities. Also, prolific course creators like Ramit Sethi and Maria Coz use elements of this structure to create online courses that work.
At the end of this article you will be able to effortlessly create online course lessons that spark engagement, keep the students engaged and creates a successful learning experience. All this without worrying about whether you’re presenting the material at the right level and questioning yourself.
The framework provides a skeleton for any lesson to make it much easier to present your material, tick all the boxes and create learning materials. Almost like a cookbook to follow, step by step.
A few more benefits to this approach:
- Link your materials to previous knowledge to make it easier for your students to learn
- Help students to use the material in real world situations (the main reason they are there). Giving them real expertise instead of empty learnings.
- Use low stress assessments to spark engagement and to help students learn.
Introducing Gagne’s Nine Events — A timeless proven lesson structure
Based on Gagne’s real-world research from the 1960s, the nine events were written to make it easier for teachers, trainers and professional instructional designers to create great learning experiences.
Since the model has survived and thrived since the 60s we can speculate that it works similarly to the way humans naturally learn and become experts. Remember that the ultimate goal here is that the student gets a result from your courses, that way they will talk to other students and recommend you, they will comment and engage with your content and eventually become one of your true fans — a real sustainable way of doing business.
Cons to any model?
Critics say that the systematic approach of the nine events leaves little space for the wonder and magic of teaching. Here at Uptick we see it as an easy way to take care of the structure and have more time to implement magic and multimedia in the content itself.
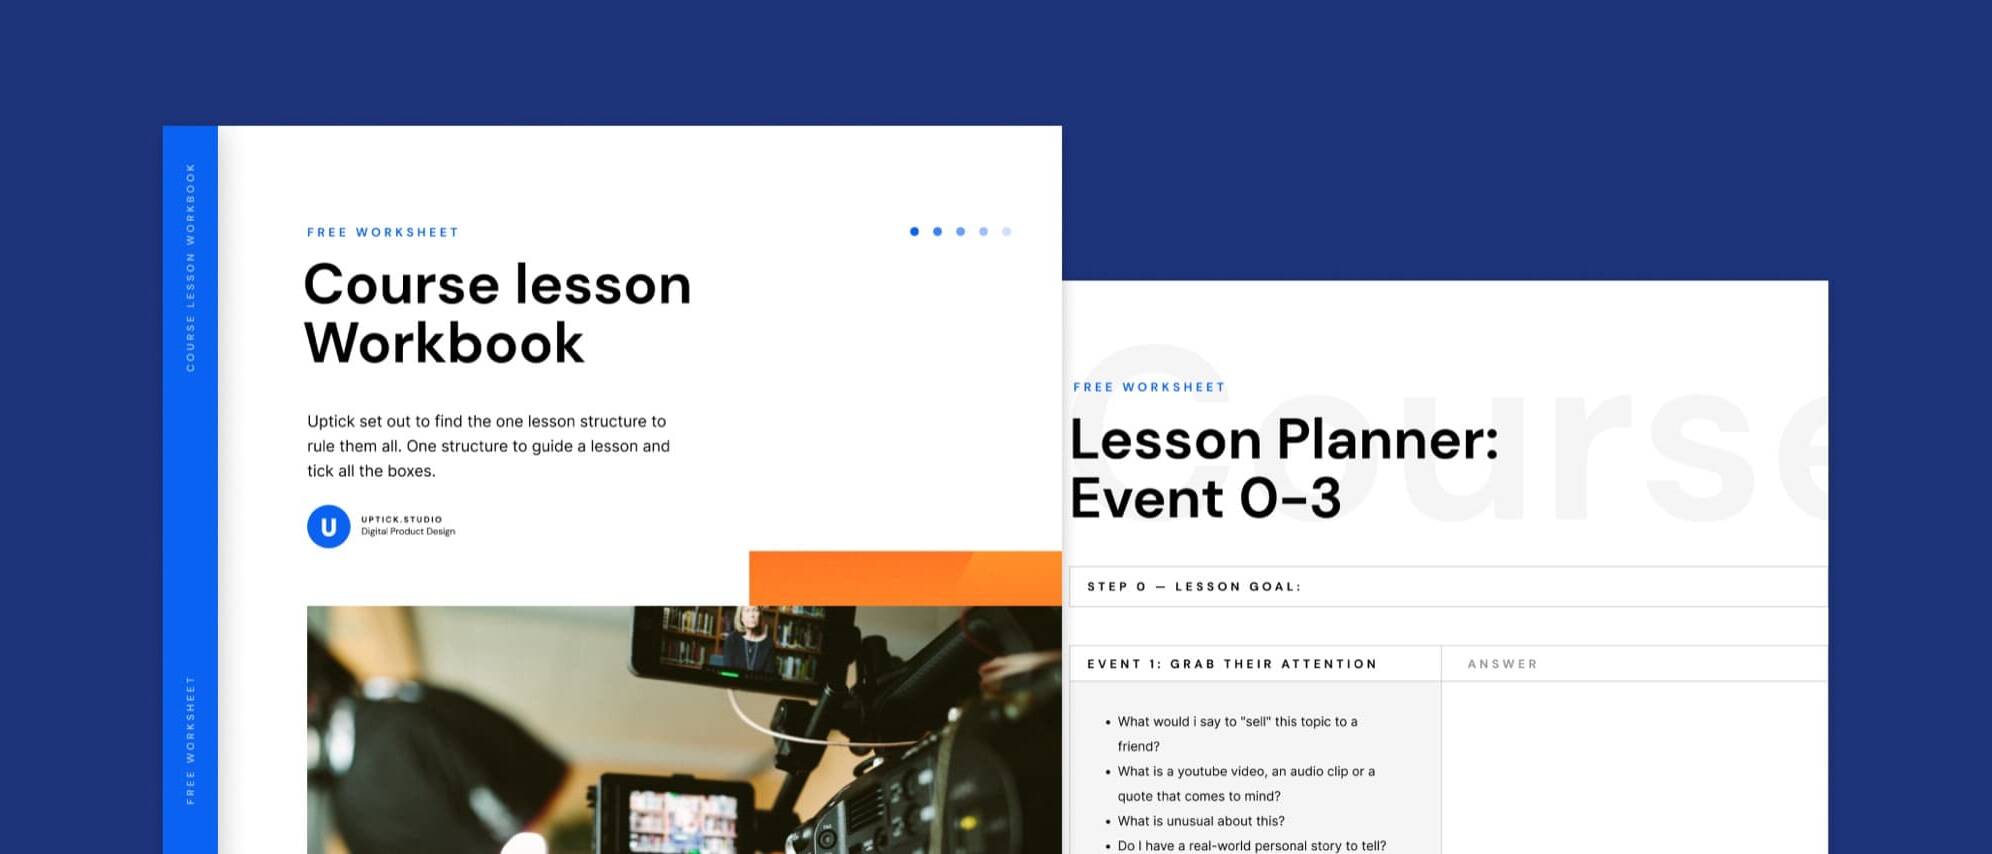
Gagne’s 9 events for online courses
Event 1-3 – Setting the scene
These first 3 events gets the students attention, tells them what they will learn and helps link the knowledge the student might already have.
The goal in this first part of the nine events is to keep the student super focused, interested and engaged by giving them a look at the delicious stuff that is to come. Secondly, to tell them what they will learn and how it can get them to their learning goal. And finally to remind them of what they already know so they can build on it.
Step 0: The unofficial Uptick step to creating a great lesson:
Before the nine steps it is important to have a clear learning objective in mind. A goal that the student can work towards that all the steps help the student to get to.
This lesson goal is essential in helping the student achieve the module goal, which is essential for the course promise.
Event 1: Getting the students’ attention
This can be done with a story, an example, a crazy fact or an anecdote. Anything that grabs the student’s attention.
Make sure to start with something that is very relevant to the lesson you are teaching. Something that shows the student that they are in the right place and that they are about to learn something that relates to their current situation.
It could be a story, a testimonial, a video or anything that makes you curious. It also should show the student why that specific lesson will help them reach their desired outcome.
Ideas:
- A testimonial from a student who has taken the course
- An honest story or struggle you have experienced
- “Imagine” stories that paint a picture of life when applying the knowledge from the lesson
Event 2: Telling the student where they will end up
Set the expectation for what the student will learn in the lesson, how it relates to the module and the course. Sum it up like: “This lesson helps you become better at negotiating by showing the 5 main mistakes people make when negotiating. This will make you more confident in the next module, which is a live negotiation session with a stranger.”
These outcomes need to be measurable otherwise it is hard for the student to know if they are on their way or if they are already there.
Ideas:
- A slide in the lesson slide deck
- A bullet point list on a worksheet
- A post-it on the student’s computer to remind them why they are doing this
Event 3: Recall prior knowledge
Remind the student of the knowledge they already have so they can pull from it in this lesson. This can be a story, a question or an assignment.
Ideas:
- Ask the student to write down 3 examples of the problems they are trying to solve
- Ask them to describe what they currently know about the topic
- Recall a story from a previous lesson
Event 4-6 – Present the content and practice
With the attention grabbed, expectations set and the prior knowledge recalled, now the student is ready and excited to learn. These next steps are about delivering and practicing the knowledge.
Event 4: Present the content
Here you present the knowledge in a way that is easy to understand and digest.
Ideas:
- Use analogies, stories and examples to make it easy to understand
- Use multimedia like video, audio and slides to keep the student engaged
- Use diagrams, models or frameworks
Event 5: Provide learning guidance
Give the student hints and tips on how to approach the content. This can be anything from a mindset shift to a simple tip on where to click to achieve something in software.
Ideas:
- Give the student prompts to think about while consuming the content
- Share rules of thumb you use when applying the knowledge
- Give a list of mistakes to avoid
Event 6: Elicit performance
This is where the student practices the knowledge with your guidance.
Ideas:
- Provide an assignment, worksheet or template
- Have the student do a live exercise with you
- Have the student do an exercise with a peer
Event 7-9 – After the presentation

Thincific has surveys to assess your students, they can even be exported to excel files.
Event 7: Provide feedback
The students have practiced with your guidance and on their own. This is the chance to correct any errors and give the student valuable information about how they are doing. Without the information of how they are doing you leave them wondering whether they did it right and if they are on the right track.
Taking any learning and applying it to the real world can be challenging, your feedback serves to make it easier to accomplish the lesson goal and after that the module and course goal.
If you see a lot of students having issues with one specific part of a module you can create a minicourse or a FAQ that helps with these problems. You can include “You’ve now completed…” messages and encouragement.
Feedback from other learners can also be very helpful.
Ideas:
- Assessing each student in an online setting can be hard to scale. A peer assessment where students post their version of the learning put into practice in a forum often works well.
- Another way is to use the automatic quizzes on course platforms so that the student can measure how they are doing.
Event 8: Assessment
Here the students get feedback on how they did. This can be thought of as a milestone assessment.
Similar to the previous assessment this step helps the student figure out what they have learned and what needs more work. It also helps the teacher tweak their lesson to better suit the student — to create a better lesson to achieve the lesson goal.
Idea:
- Group discussions are great to engage learners, in an online course you can use a forum like circle.so or a Discord server.
Event 9: Maximizing retention and learning
A critical step in helping students use what they have learned in a wider real-world context. For example in a Spanish language course you could facilitate speaking with native speakers.
Ideas:
- Can you use real world practice of the material?
- Can you have the students periodically engage with practice of the learned material?
- Can you provide a PDF that the student can bring along to continuously refer back to in real-world situations?

Tiaho Forte setting up an assignment make the lesson stick
Next steps
Here at Uptick we say that no lesson plan ever survived first contact with students. It is easy to create a perfect structure on your screen, but when it comes to actually delivering the content in real life your approach will change based on the skill level of the group, the speed you are delivering the content with and how you relate to the material.
As an online course teacher it is important to stay flexible and ready to change material based on the feedback you get from your students. Your recorded lessons should be just a version 1 out of many as you get closer to the best way to teach the material.
Conclusion
You now have an overview of how best to structure a course lesson and tick all the boxes as you move towards the perfect lesson.
Armed with this tool-set you will likely find yourself being more sure of your abilities as a teacher and planning will become so much easier.
As a bonus we have created a worksheet that you can download here.
Please let us know in the comments if this was helpful to you and how you will structure your next lesson!